E-commerce accounting: How to set up your chart of accounts
One of the many things you’ll need to set up when starting your e-commerce business is a chart of accounts. Doing it right from the beginning is essential to making sure your accounting processes run smoothly and your books are organised. You’ll be able to get a better understanding of your financial position and make scaling your business easier.
In this article, we’ll run you through the basics of a chart of accounts, as well as the unique considerations you need to make when setting up a chart of accounts for an e-commerce business. Plus, we’ll explain how using an accounting integration can make the process of setting up accounts in your accounting software much easier.
What is a chart of accounts?
A chart of accounts is essentially a list of categories that an organisation sets in order to distinguish financial transactions. In general, the high-level categories will be assets, liabilities and shareholder’s equity for the balance sheet, and revenue and expenses for the income statement.
Organisations will then typically have sub-accounts or sub-categories underneath each account. These will depend on the the of transactions the organisation deals with and can change as the organisation develops. These sub-accounts can be useful when developing in-depth, insightful reports.

How to number your chart of accounts
To help with tracking transactions, each account will have its own reference number. There’s no hard and fast rule for how to choose to number the accounts. However, you’ll want to consider what numbering system will allow you to add new accounts if your organisation were to scale in the future.
A more simple system might be based on 3 or 4 digits. For example:
- Assets: 1000 – 1999
- Liabilities: 2000 – 2999
- Equity Accounts: 3000 – 3999
- Income: 4000 – 4999
- Expenses: 5000 – 9999
Larger businesses might want to use 5 digits. Different digits might represent a division of the company or departments. For example, income accounts could be represented by 40000 – 49999. The second number might determine a division and the last three numbers could represent a product line. Therefore, 42001 would represent income from division #2 for product line 001.
Can I use the default chart of accounts in my accounting software?
Depending on what accounting software you use, you might find that there will be default accounts and sub-accounts. Often, as an e-commerce business, you won’t need to use all the sub-accounts and/or you will need to add more. You can do this by importing a file, using a template, or manually adding sub-accounts.

To simplify some of the process, you can use an accounting integration that automatically creates relevant sub-accounts and maps transactions to the corresponding sub-account. This is explained in more detail in the last section.
What’s unique about the chart of accounts for an e-commerce business?
In order to get the best breakdown of transactions occurring, you’ll want to make sure you’ve set up relevant sub-accounts in your chart of accounts. For example, a brick-and-mortar store might not deal with shipping costs or revenue from charging shipping fees. However, as an e-commerce business, it would be useful for you to see these transactions distinguished from other costs or revenue from goods sold.
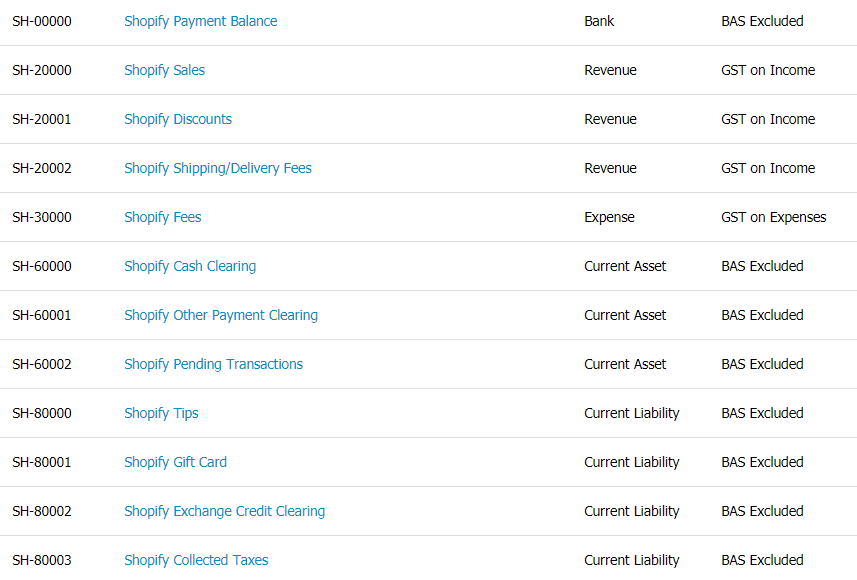
A unique account that is useful for e-commerce businesses is a ‘checking account’, ‘bank’ or ‘payment balance’ account. Essentially, this account tracks the amount of money that is still held by your e-commerce platform. For instance, if you have a Shopify store, you might have an account called ‘Shopify Payment Balance’ that’s classified as a ‘Bank Account’ or ‘Bank’ in your accounting software, representing the amount of money Shopify holds.
Other sub-accounts that might be relevant to your e-commerce business:
- Sales (Revenue)
- Discounts (Revenue)
- Shipping/Delivery Fees (Revenue)
- Exchange Credit (Current Liability)
- Gift Card (Current Liability)
- E-Commerce Platform Fees (Expense)
- Website Hosting Fees (Expense)
- Advertising (Expense)
- Storage Fees (Expense)
- Inventory (Asset)
Using an accounting integration to set up sub-accounts
By using an accounting integration, you can get your chart of accounts set up in just a couple of minutes. For example, you can use a Shopify and Xero integration, BigCommerce and QuickBooks integration or Squarespace and QuickBooks integration to connect your e-commerce platform to your accounting software.
By using the Express setup option, the integration will automatically create relevant sub-accounts such as Shopify Payment Balance to be used as a ‘bank account’ and Shopify Shipping/Delivery Fees. Then, sales and payments transactions will be automatically mapped to the corresponding sub-account.

However, please note that the integration will only automatically create sub-accounts relevant to sales and payments data that can be taken from from your e-commerce platform. If you want to add sub-accounts such as inventory costs, storage fees, shipping costs, Facebook Ads, or any other transaction type not captured, this will need to be done separately.
If you have existing sub-accounts that you want to map sales and payments to, or you want to customise your chart of accounts, you can use the Advanced setup method. Generally, this is recommended if you’re a bookkeeper or accountant, or if you’re working with one. You can also go through our Guided setup method where you can book a free 30-minute video call with one of our experts.
Key takeaways on e-commerce chart of accounts
Though the process might sound complicated, there’s not much to do after you’ve finished the initial set up. To maintain your books, you’ll need to make sure transactions are mapped to the correct sub-accounts, or you can use an integration that will categorise transactions for you automatically. As time goes on, you may need to add new sub-accounts in order to get a more detailed balance sheet and/or income statement.